 In this article, we are going to discuss what steps need to be followed in order to restore or recover a website from the JetBackup backups. The JetBackup plugin is available in cPanel and can be used to restore the website files and databases from the available backups.
What is JetBackup?
JetBackup is a very simple and straightforward solution that is used to retain copies of your site’s data. It is counted among the leading backup solutions in the web hosting industry.
JetBackup offers both remote and local incremental backups. In simple words, JetBackup is a handy tool that you can make use of whenever you wish to backup your website’s content, such as email, databases, files, and other data.
How to restore your website from JetBackup?
The restoration of a website from JetBackup consists of two steps which are:
1. Restore files and directories
2. Restore database.
Restore files and directories
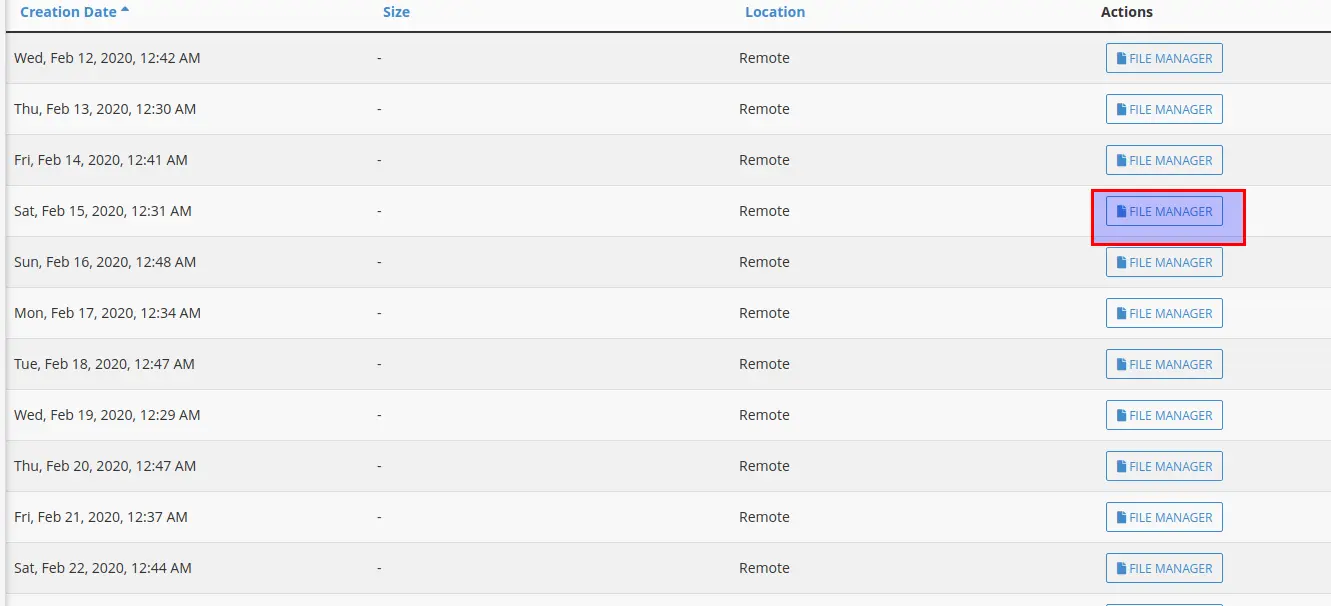
To restore files and directories, first login to cPanel and navigate to the JetBackup section or open the JetBackup Plugin. Now select the File Backups

Now this section will be displaying the dates in which the backups are available. Select the date and click on FIle Manager option shown in the right side.
On selecting the File manager button, a new page will be open which lists all the files and directories under the home directory of your account. You can also tick on the “Show Hidden files” but to see hidden files inside the directories.
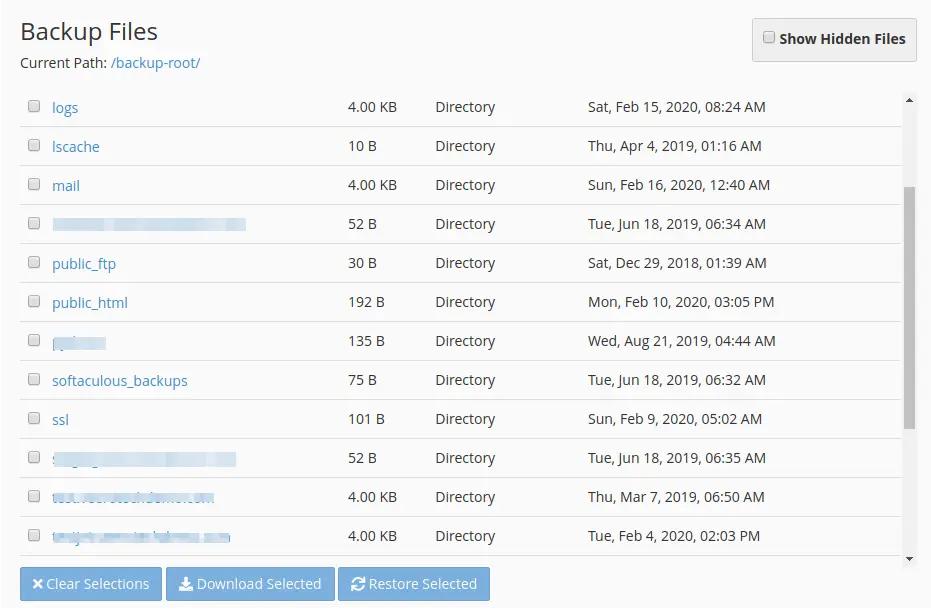
Now check the directories you want to restore inside your account and click on Restore Selected button which will prompt to a confirmation message . Once accepted the restoration process will be added to the queue.
Restore database
To restore database, first click on the Database Backups option under the JetBackup section.

From there the date,size and databases under your account will be listed. Now select the database you want to restore in your account and click on the Restore button.
Clicking on restore will prompt a confirmation message and following that the restoration will be added to the queue. The restoration progress will be displayed on top of the page and once completed you will get the website loading from the backup you selected.